
You can find the source code for this tutorial on GitHub: https://github.com/bettercoding-dev/flutter-jwt-auth.
If you want to code some parts of the app yourself, checkout the
follow-alongbranch. There, I removed some code, so you can implement it yourself. This will help you to understand better and improve your coding skills.
What is JWT authentication?
Before we start, let us have a quick look at what JWT even means. JWT stands for JSON Web Tokens. It is basically a JSON object encoded into a base64 string and signed with a secret key.
The token is issued and signed by a server and sent to a client after a successful login. Now the client can include this token in all its requests to the server. The server can then take a look at the token and verify that it has not expired and that the signature matches.
You can think of it as a ticket for an amusement park or public transport. You show it to someone, and they will verify that the ticket has not expired and that the ticket is not fake. If everything is fine, you can use the service.
JWT refresh tokens
To prevent users from being signed out every time the token expires, it is common for the server to issue two types of tokens: a token used for authenticate the calls, and a refresh token, that can be used to ask the server for a new token.
You can learn more about JWT on https://jwt.io.
You can think of the refresh token as a second way to login. Instead of sending your credentials to the server, the refresh token is used. But in contrast to a normal login, the token refresh takes place in the background and the user will not notice it.
In this tutorial, we will set up our Flutter app to use tokens for authentication, and request new tokens using refresh tokens.
Prerequisites
The app that we are creating in this tutorial will be relatively simple. It will allow the user to log in and log out and to display the current server time in the app. The request for fetching the server time is authenticated and is only allowed for logged-in users.
Before we start, download the project from: https://github.com/bettercoding-dev/flutter-jwt-auth.
Let’s have a look at our project structure. It uses the same architecture as explained in this tutorial.
If you have checked out the code from the repo, you can see the following folders and files in the lib folder.
main.dart: the entry point of the appglobal_providers.dart: globally neededriverpodproviders are created here, especially the initialization ofDiowill be of interest heretime: includes all files needed for fetching the time and displaying it in the appcommon: non-feature-specific filesauth: authentication-specific files.client: implementation of authentication REST callsloginandrefresh.interceptor: containsAuthInterceptorthat we will use to authenticate our calls and implement refresh handlingmodel: contains a simple modelAuthDatacontaining both tokensrepository: abstraction layer that handles authentication-specific operationsstate: containsAuthController, which handles authentication-specific state.
We will focus on implementing the AuthInterceptor and the AuthController.
The test server
To actually test our implementation, the source code also contains a small server that issues tokens and includes an authenticated API-Endpoint.
You can start it with the following command:
dart server/shelf-jwt-test-server/bin/server.dart
This will run the server on localhost at port 8080.
If you are using the iOS Simulator, that you are good to go.
For the Android Emulator, you will need to change the baseUrl of the API to 10.0.2.2.
If you are using a real device, you will need to replace the IP with the address of your computer.
You can change the baseUrl in global_providers.dart.
I built the server using the shelf package. You can also check out a standalone version of the server on Github: https://github.com/bettercoding-dev/shelf-jwt-test-server.
Implementing AuthController
First, let us implement the AuthController. It’s responsible for holding and manipulating
authentication-specific state.
In this example, it is implemented as a riverpod Notifier. This means we need to implement the build method first.
Use
dart run build_runner watch --delete-conflicting-outputsto regenerate code.
build
The build method is responsible to initialize the state.
For us, this means to check our storage if there are any stored tokens available and update the state accordingly.
| |
The StorageRepository uses the flutter_secure_storage package to safely store the tokens on the device.
login
Next, let us implement the login. In this simplified example, we only take a username to log in. Our test server does not care about a password.
| |
We are initiating a login call using the AuthRepository. If everything works as expected, AuthData will be returned.
We store the received data in using the StorageRepository and set our state.
The
AsyncValue.guardfunction is a cool helper fromriverpod. If everything works as expected, aAsyncDataobject ist returned. If an error is thrown inside the guarded function, anAsyncErroris returned.
refreshToken
The refreshToken function is very similar to the login.
But instead of using the username to authenticate, we check if a refreshToken is available and use that one instead.
In case of success, we update the state with the new tokens.
If the token refresh fails (most likely because the refresh token expired as well), we are going to log out the user.
| |
logout
Logging out using JWT is pretty straightforward. All we need to do is to remove our tokens from the storage and clear the state;
| |
Implementing AuthInterceptor
Interceptors are a way to add functionality to Dio when sending requests, receiving responses or handling errors.
The functions of an interceptor are called every time one of these three events occurs, and allow to make modifications
to the HTTP calls.
Adding Interceptors
The interceptors can be added when creating a new instance of Dio. In our case, this is done in the
global_providers.dart file.
| |
We add two interceptors here. The PrettyDioLogger will print all requests and responses to the console. This helps
debug in case of errors.
Secondly, we add our AuthInterceptor to the interceptors list.
Adding the Authorization header
When you open the auth_interceptor.dart file, you can see that there are two functions we would like to override.
For adding JWT to outgoing requests, the onRequest function is the one we want to implement.
| |
It’s actually not too complicated. We first check the state of the AuthController, if a token is available.
If not, we cannot do anything and just leave the request as it is.
In case we have an available token, we add it as an Authorization header, as you can see in line 6.
Remember to add Bearer in front of your token.
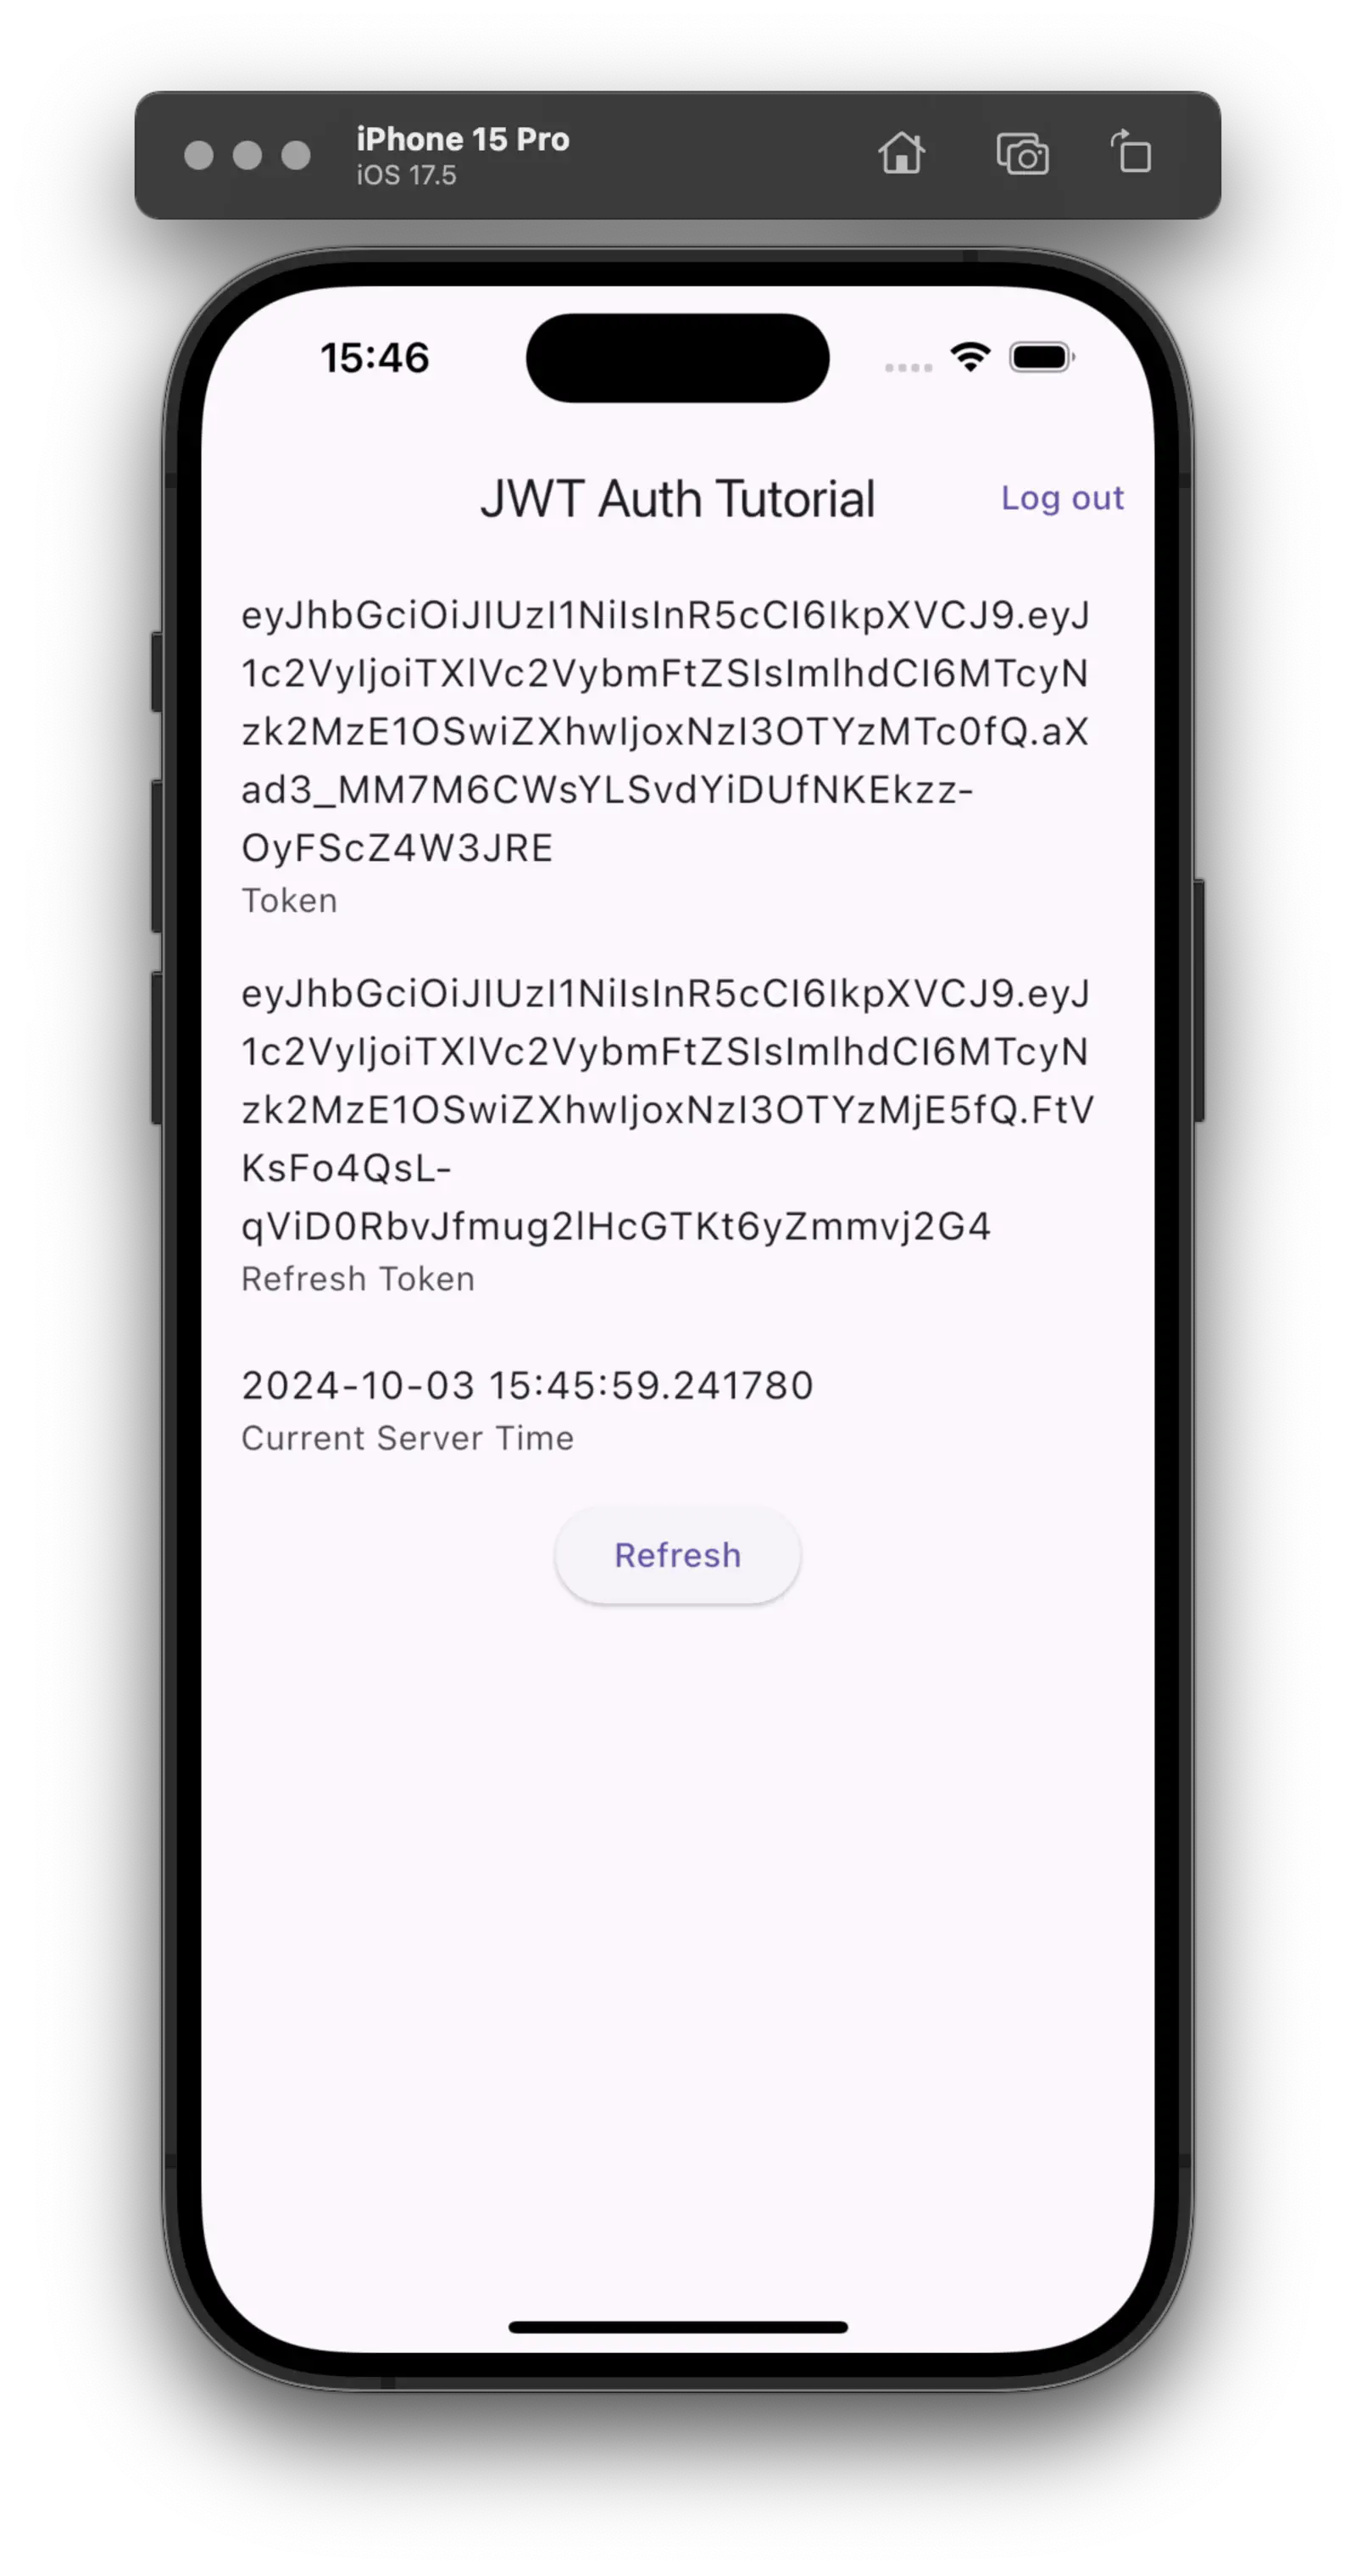
Now you can start the app and click the login button. You should se the token and the refresh token values, as well as the current server time displayed on the screen.
If you click on “Refresh” a new request will be sent to the server asking for an updated time. This will work as long as your token is valid (15 seconds in this case). After that, you have to log in again to get a new token.

Implement Token Refresh
Since it would be annoying to log in again every time the token expires, let us use the refresh token to update our tokens.
We are going to do that by implementing the onError function of the interceptor.
| |
Line 3: Here we are checking for an extra called
isRetry. This is a flag that we set below in line 15 to mark a request when we retry to get data from the server after updating the tokens. That way, we avoid endless loops when retrying failed requests over and over again.Line 6: We check if the request failed because it was unauthorized, and if we haven’t retried this request already.
Lines 8–11: We get hold of our refresh token. If we do not have a refresh token, we cannot refresh and simply let the call fail (line 20).
Line 12: We call the
AuthControllerto refresh the tokens. If that throws aDioExceptionwe fail the call as well (line 24).Lines 14–18: After refreshing the tokens, we give the request another go. After setting the
isRetryextra, we usedio.fetchto execute the request once again. If it successfully returns a response, we use the response to resolve the error.
Try the token refresh
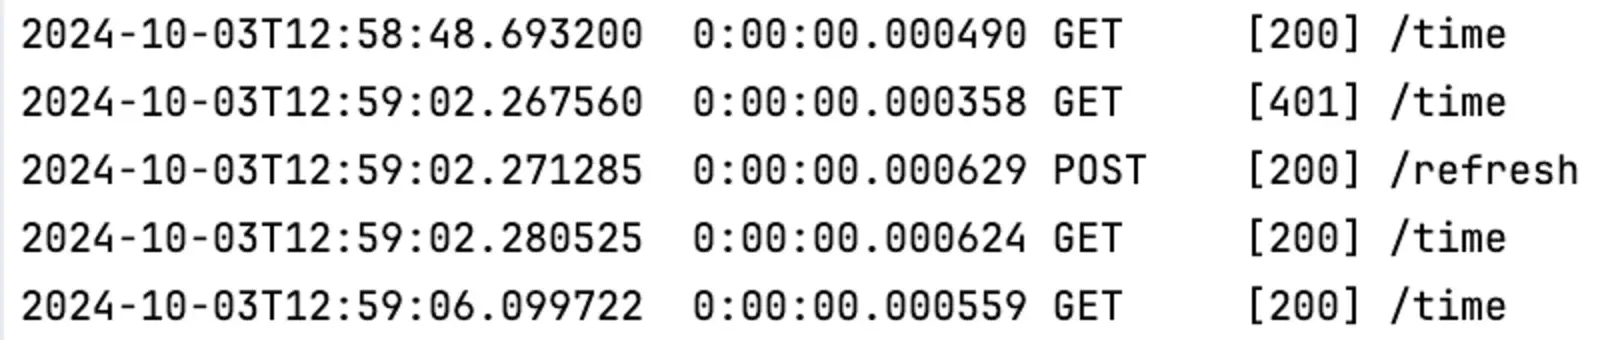
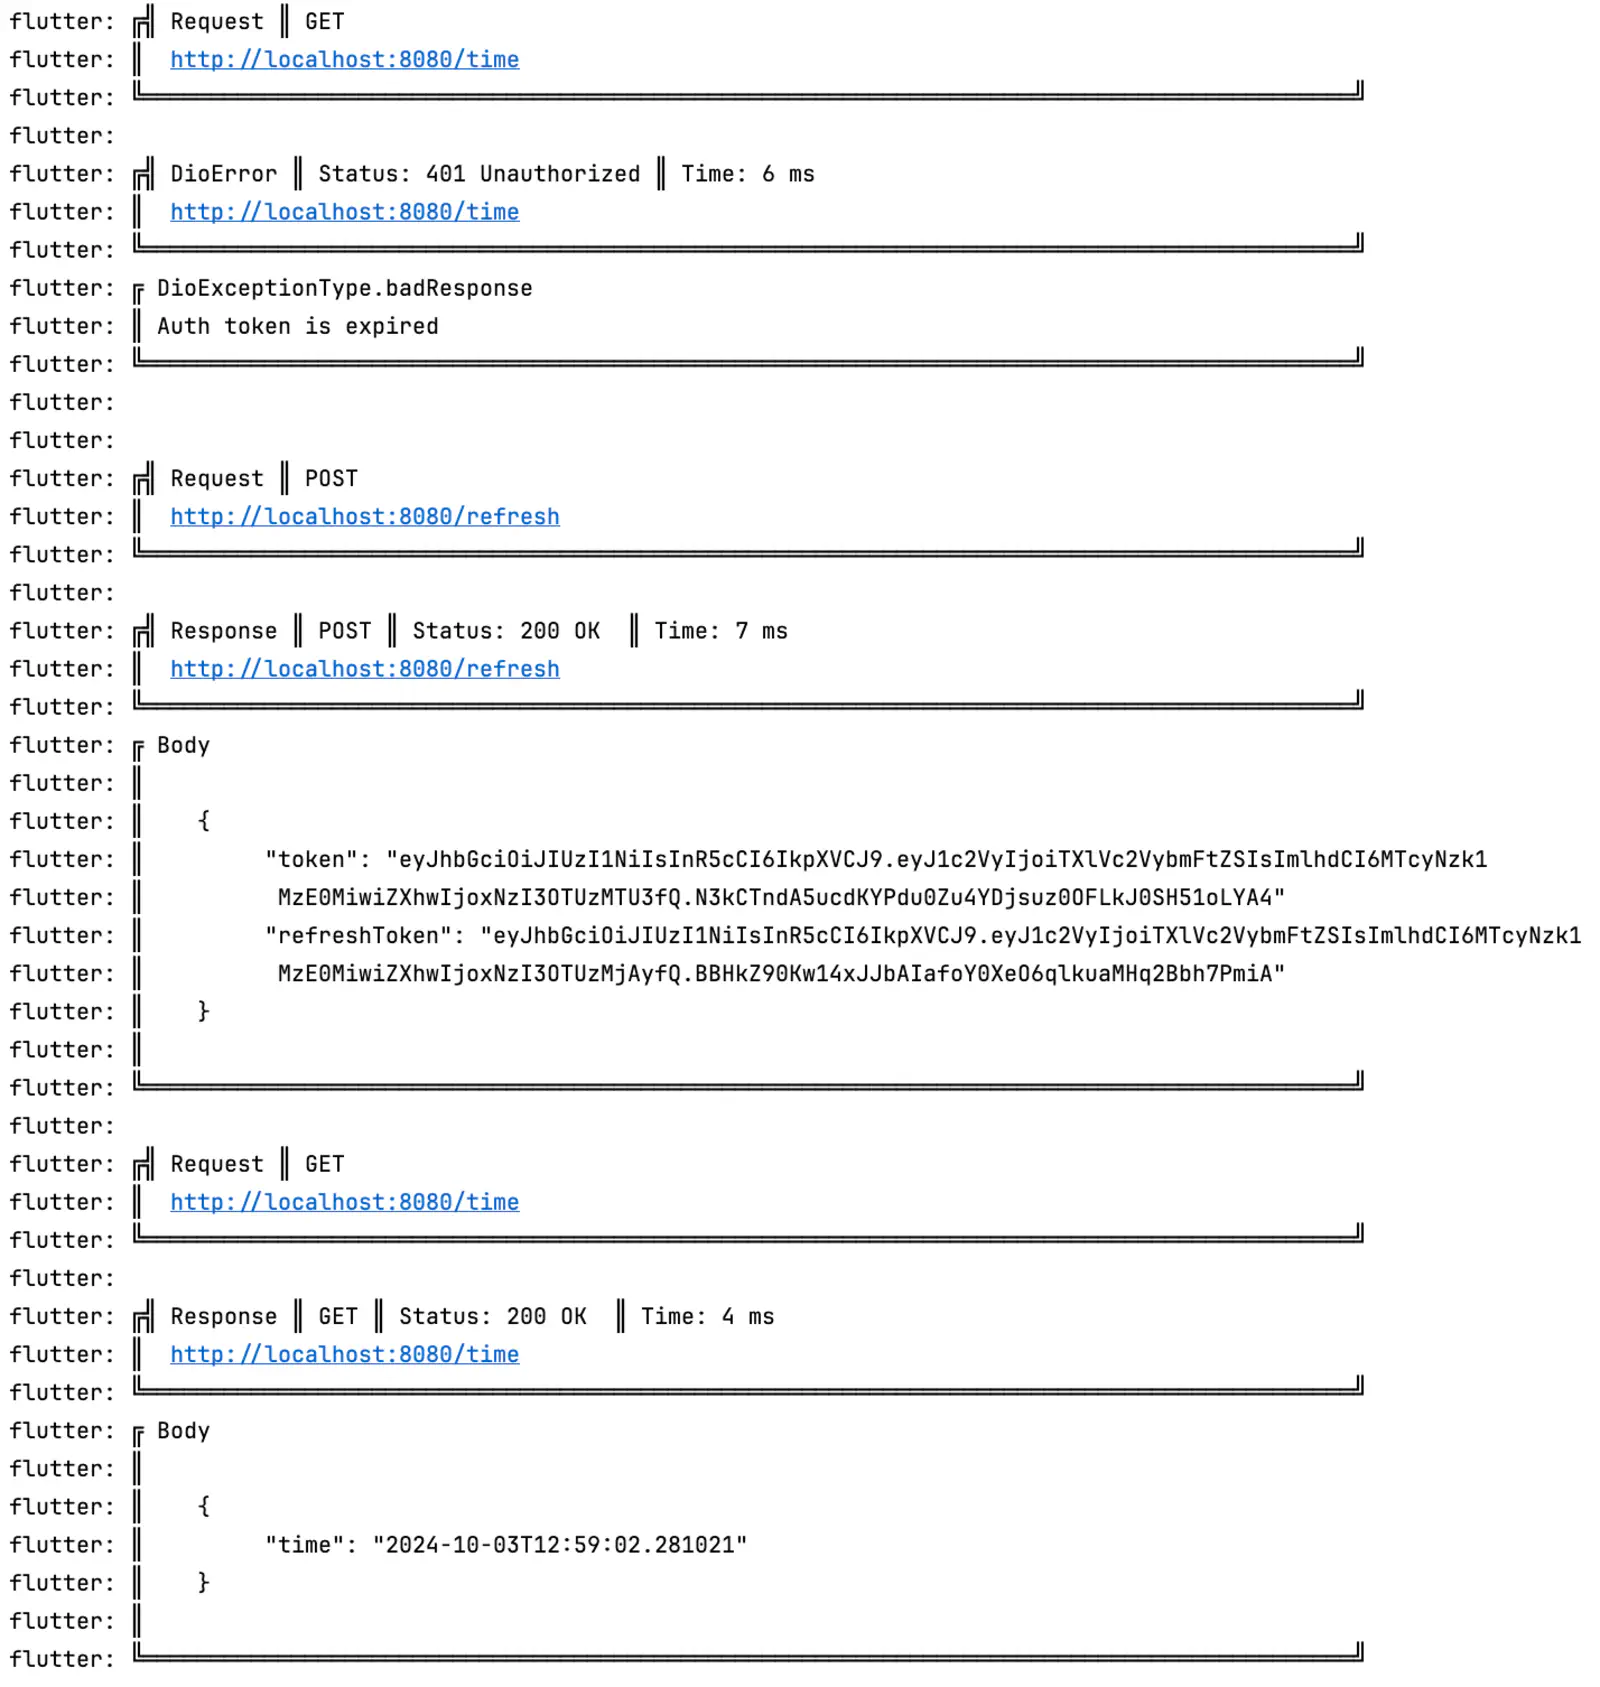
Now, when we start our app and log in, you can now keep pressing “Refresh” although the token has expired. If you check the logs, you can see that in the background, the app has been refreshing the tokens.
Notice that the refresh token can expire. If this is the case, you get logged out.
Summary
In this tutorial, we have learned how to set up a Dio interceptor to use JSON Web Tokens to authenticate against an
API.
We used a refresh token to prevent the user from being logged out continuously, but instead refresh the authentication token instead.
The tokens are stored in an encrypted storage, and we use riverpod Notifier to keep track of the authentication
state.