Introduction
The riverpod package is a great Flutter package for state management. It comes with good documentation (that you
can find here), but it can be a bit tricky to set up an app architecture using this
package.
In this tutorial, we are going to write a very basic app, showing how a Flutter app can be structured when using Riverpod.
You can find the source code for this tutorial on
GitHub: https://github.com/bettercoding-dev/riverpod-architecture.
Data Flow
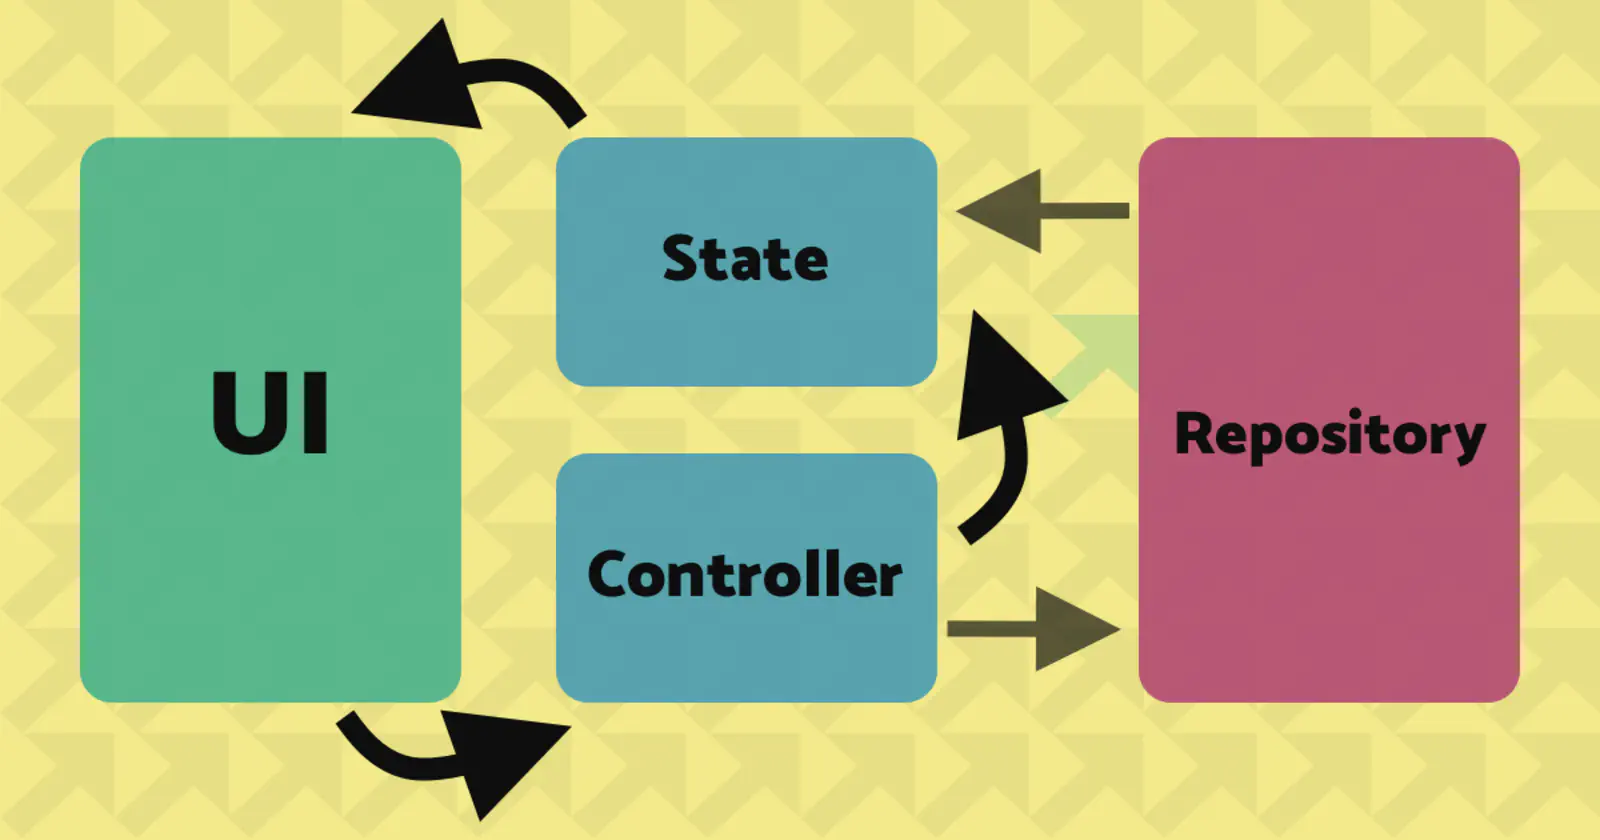
Let’s have a look at data flow within our app.
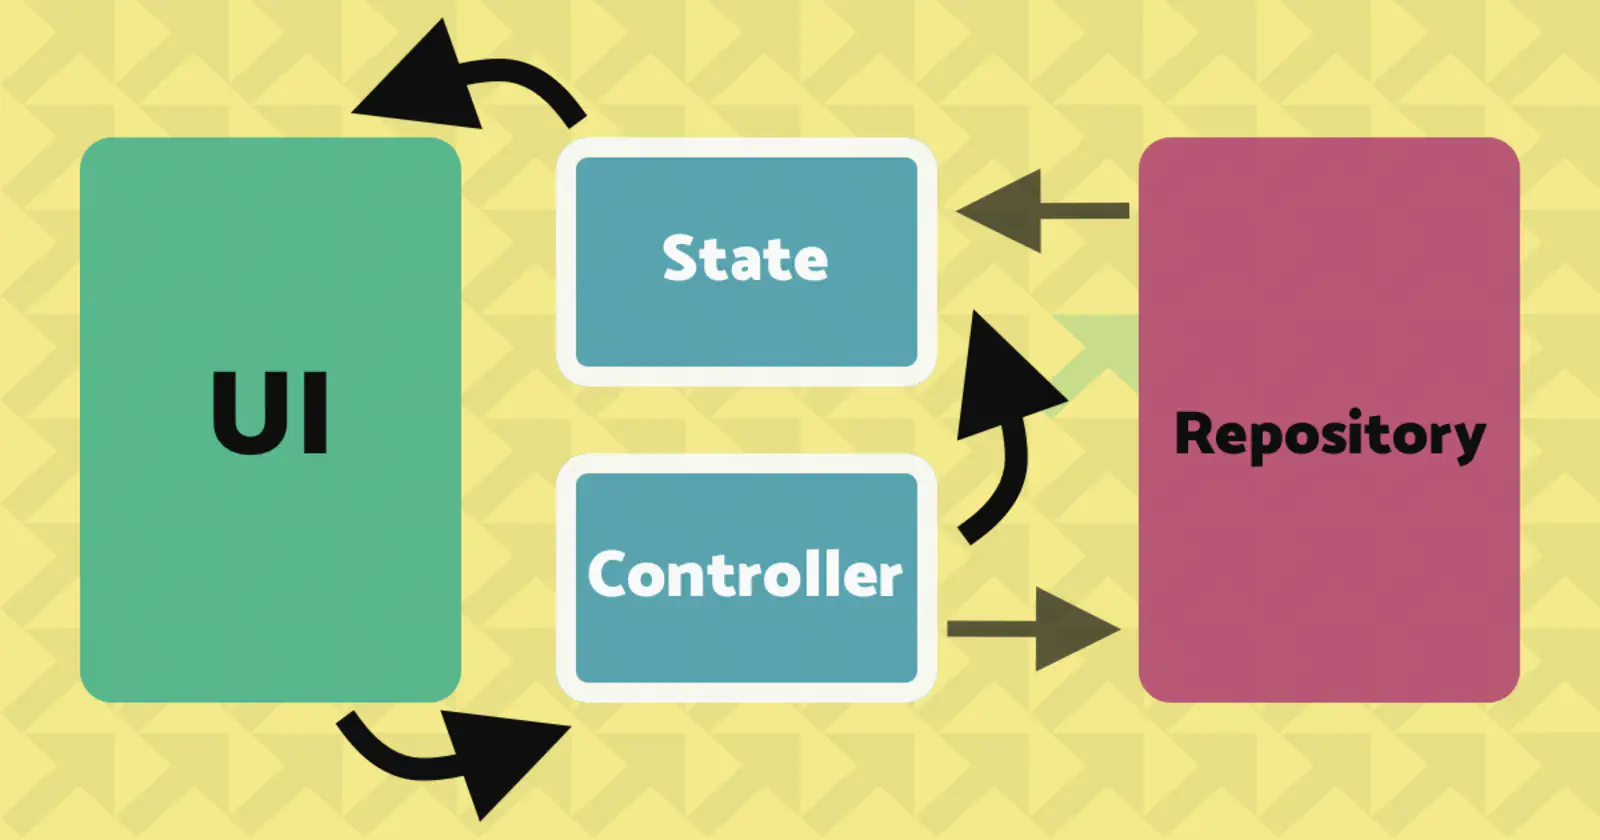
First, our app will have a state. A state can be a set of data that defines what to show to the user. In our example, this will be a list of entries that will be displayed in the app.
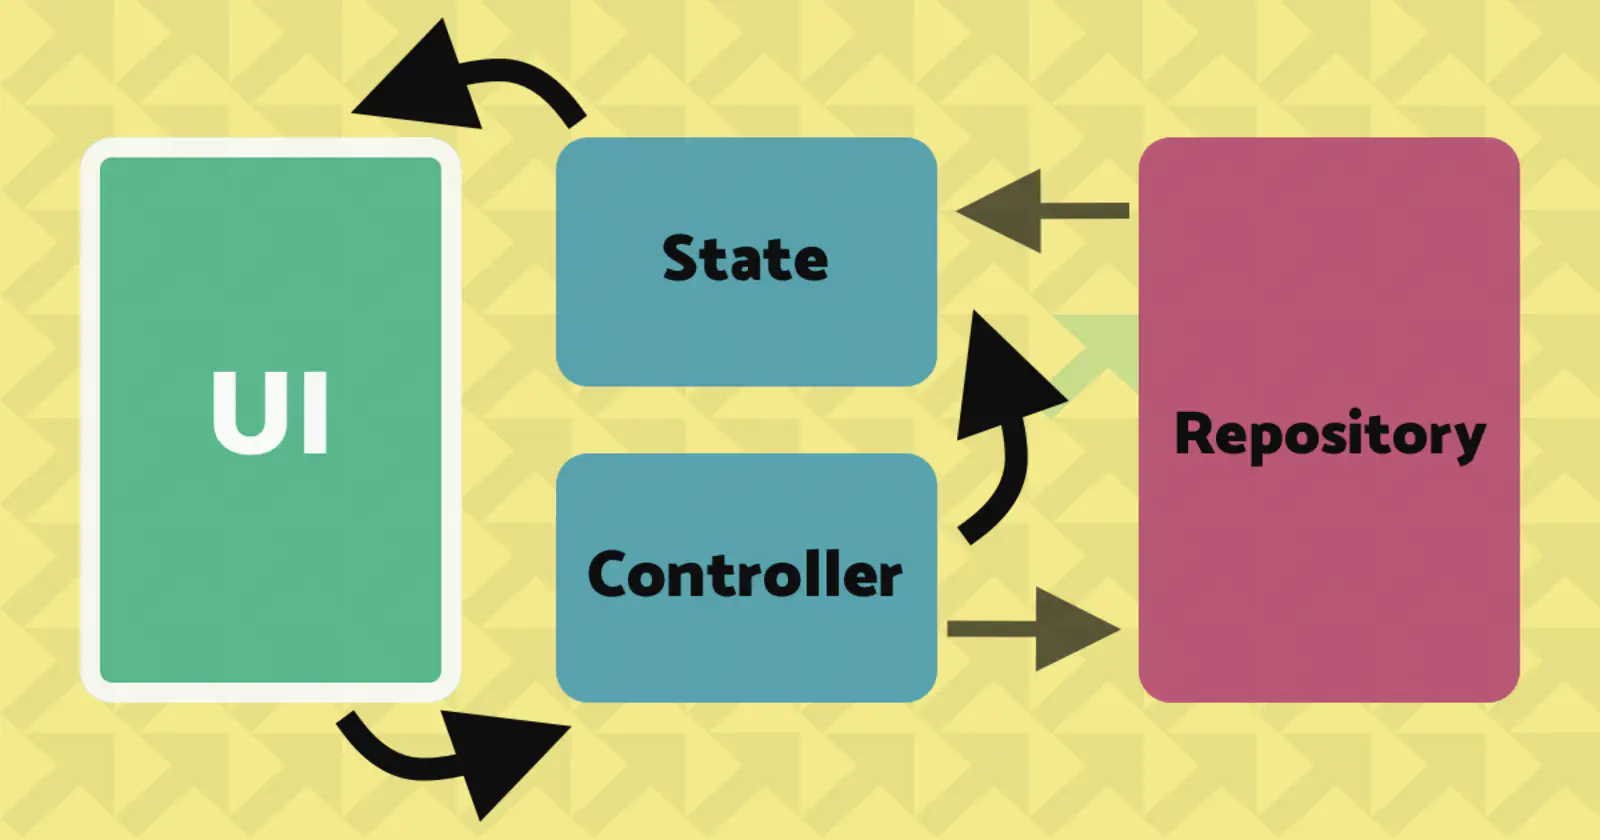
The user interface (UI) is updated according to the state. Every time the state changes, our UI is recreated with the new data.
When there are user interactions with the UI – such as button clicks – these events are forwarded to the controller. The controller is then responsible for performing actions accordingly and update the state.
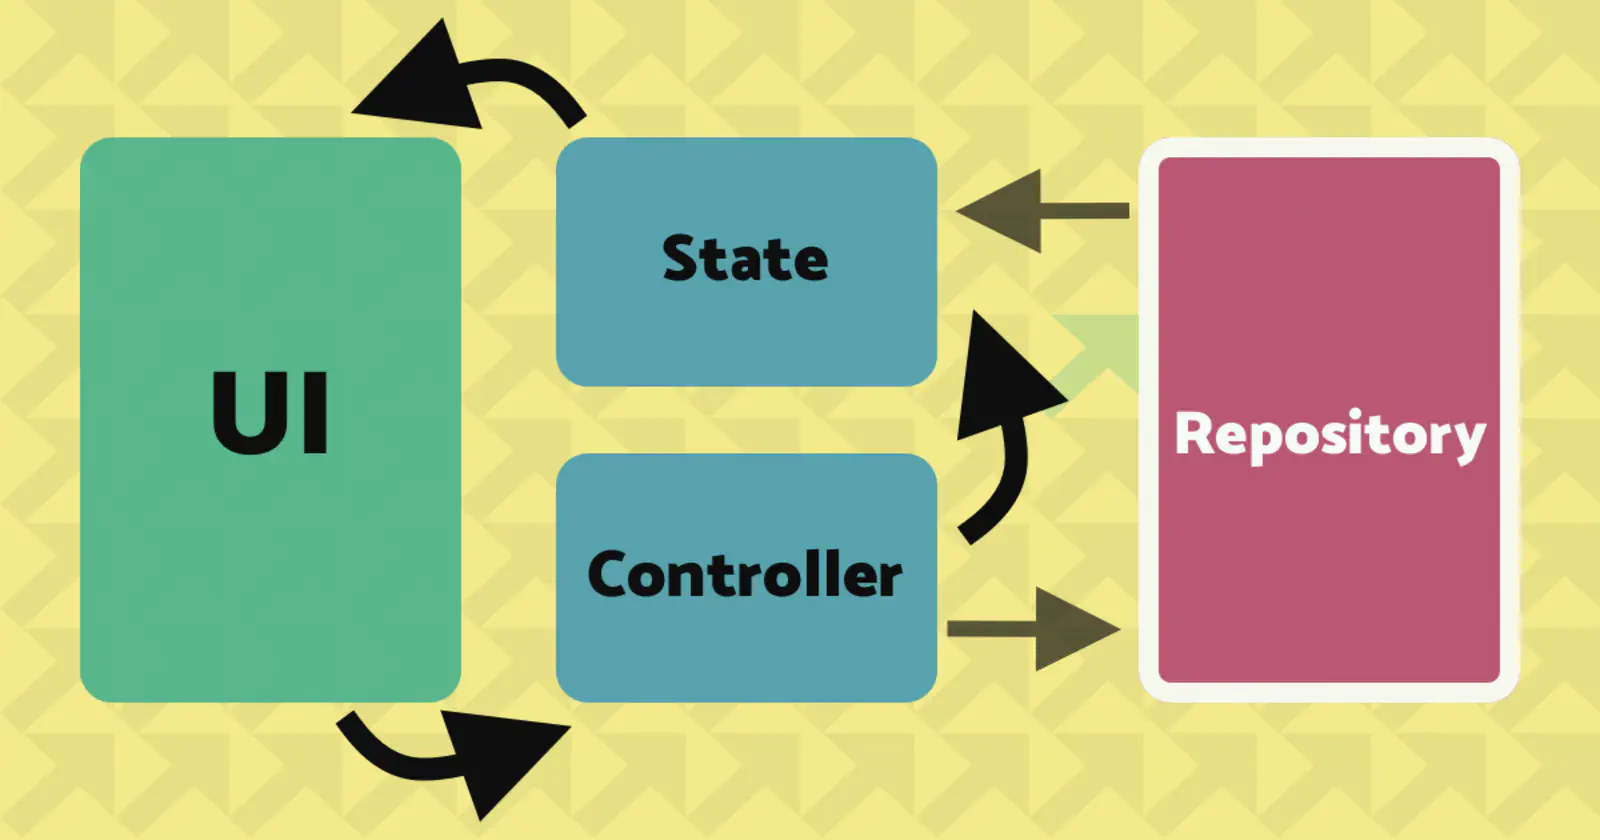
The repository is responsible for managing the data. In our app, it will hold a list of entries, provide a way to fetch them and allow the add and remove these entries.
Prerequisites
Now, that we have a basic understanding, how the components of our app should look like, it’s time to start a new project.
I always perform a few steps when creating a new project, like cleaning up my pubspec.yaml and main.dart file.
Take a look at my article 5 Things I do when starting a new Flutter project for more information.
Once the project is created, add [flutter_riverpod](https://pub.dev/packages/flutter_riverpod) to your dependencies.
It is the only package we need for this tutorial, and our pubspec.yaml file should look like this afterward:
| |
Also, we need to wrap our app in a ProviderScope to make Riverpod work.
| |
Entry Repository
First, we start by creating a repository. This repository will be absolutely minimalistic and is just thought to mimic a repository that we would use in a larger app, such as a repository reading from a database or accessing a REST API.
We create a new folder in our src directory and name it repositories. Inside this directory add a file called
entry_repository.dart.
Add following class:
| |
You might be wondering, why use async functions with Future.delayed()here. This is to simulate how a repository
would behave when – for example – loading data from an API. These requests would be async as well, and it makes sense
to have a look at how to handle asynchronous calls.
Riverpod for Dependency Injection (DI)
Now, that we have a repository, we will have a look at how to use Riverpod to provide the EntryRepository to other
parts of the app.
One cool thing about Riverpod is that we can use its providers also to inject dependencies into other components. Let’s have look how this works.
class A {}
class MockA extends A {}

class B {
  A a = A()
}
In this example, class B directly creates an instance of class A. This has the disadvantage that if we want to
replace the way A is created, it is necessary to make changes to class B. One situation, where we probably want
to replace A, is when testing our application. It is a common pattern to use mock instances instead of real
instances.
For more information about mocking, read: https://flutter.dev/docs/cookbook/testing/unit/mocking.
So, how can we solve this problem with Riverpod? We simply need to create a Provider for each component that we
want to inject into another component.
For the example above, we can use Riverpod this way:
| |
We created a Provider called aProvider that is responsible for providing an instance of A. In tests, we could
override this Provider to return a mock version of A instead.
We also created a Provider bProvider that constructs an instance of class B. You can see, that we used
ref.watch(aProvider) to retrieve an instance of A from aProvider and then return a new instance of B the result.
So, for our project, this means that we need to create a Provider for our EntryRepository. I like placing this
Provider on top of the provided class:
| |
State & Controller
We are going to create new directories pages/home in the src directory. In home put a new file called
home_page_controller.dart. This file is going to hold the state and the controller of our home page that we will
create later.
First, we create a new Provider called entriesProvider that holds the state of the entries we want to display.
| |
This should look similar to what we did earlier. One difference is that we now need to use a FutureProvider instead of
a Provider. This is necessary because entryRepository.allEntries() returns a Future instead of a synchronous
value.
Next, we add a class called HomePageController. This class will be responsible for handling UI events.
| |
You can see, that HomePageController has two attributes: ref and entryRepository. We are going to inject them
later when creating a Provider for our controller.
The ProviderRef gives us access to functions involving the state of our app. It is used in lines 9 and 14 to
tell the entriesProvider to refresh its state once we performed actions on our EntryRepository.
Finally, to make the HomePageController available in our UI, we also need to add a Provider for this class.
| |
User Interface
As the last step, we will create a HomePage widget to view and manipulate entries in a list. If you have created a
home_page.dart file already, move it to src/pages/home. Otherwise, create the file in this directory.
Instead of a StatelessWidget, we will use a ConsumerWidget for our page. ConsumerWidget is part of the Riverpod
package and offers us an additional WidgetRef parameter for the build() method. This parameter we can use to access
the Providers we created earlier.
| |
We utilize this ref to retrieve the elements provided by entriesProvider. Here we also see how beautifully this can be
done with Riverpod:
| |
We use ref.watch() to listen to changes of the state of our entriesProvider. The watch function returns an
AsyncValue that allows us to call the when function to provide different widgets depending on the state (*
loading*, error, data) of the Future. This is a really convenient way to provide loading and error widgets.
Interactivity
Now, let’s add away to add and remove entries. For this, we add 2 methods to our HomePage.
| |
We use the passed WidgetRef to access the HomePageController using the read function. Now we can simply call the
functions of the controller.
When onAdd is called, we simply add a new entry containing the current data. When onRemove is called, we pass the
entry that should be deleted to the controller.
WidgetRefcomes with two functions to access providers:watchandread.watchshould be used when you want to listen for changes to the provided value. This makes sense when being used for building widgets. In callbacks like button clicks or similar, we do care about changes made to the provider. In this case, we use thereadfunction to access the provider.Have a look at Riverpod’s documentation for more information on reading providers.
Next, we will link this functions with the UI. For adding new entries to our list, we create a
FloatingActionButton. The delete action will be done when tapping an element in the list. Finally, the HomePage
should look like this:
| |
We are done! It’s time to run the app and view what we have built.
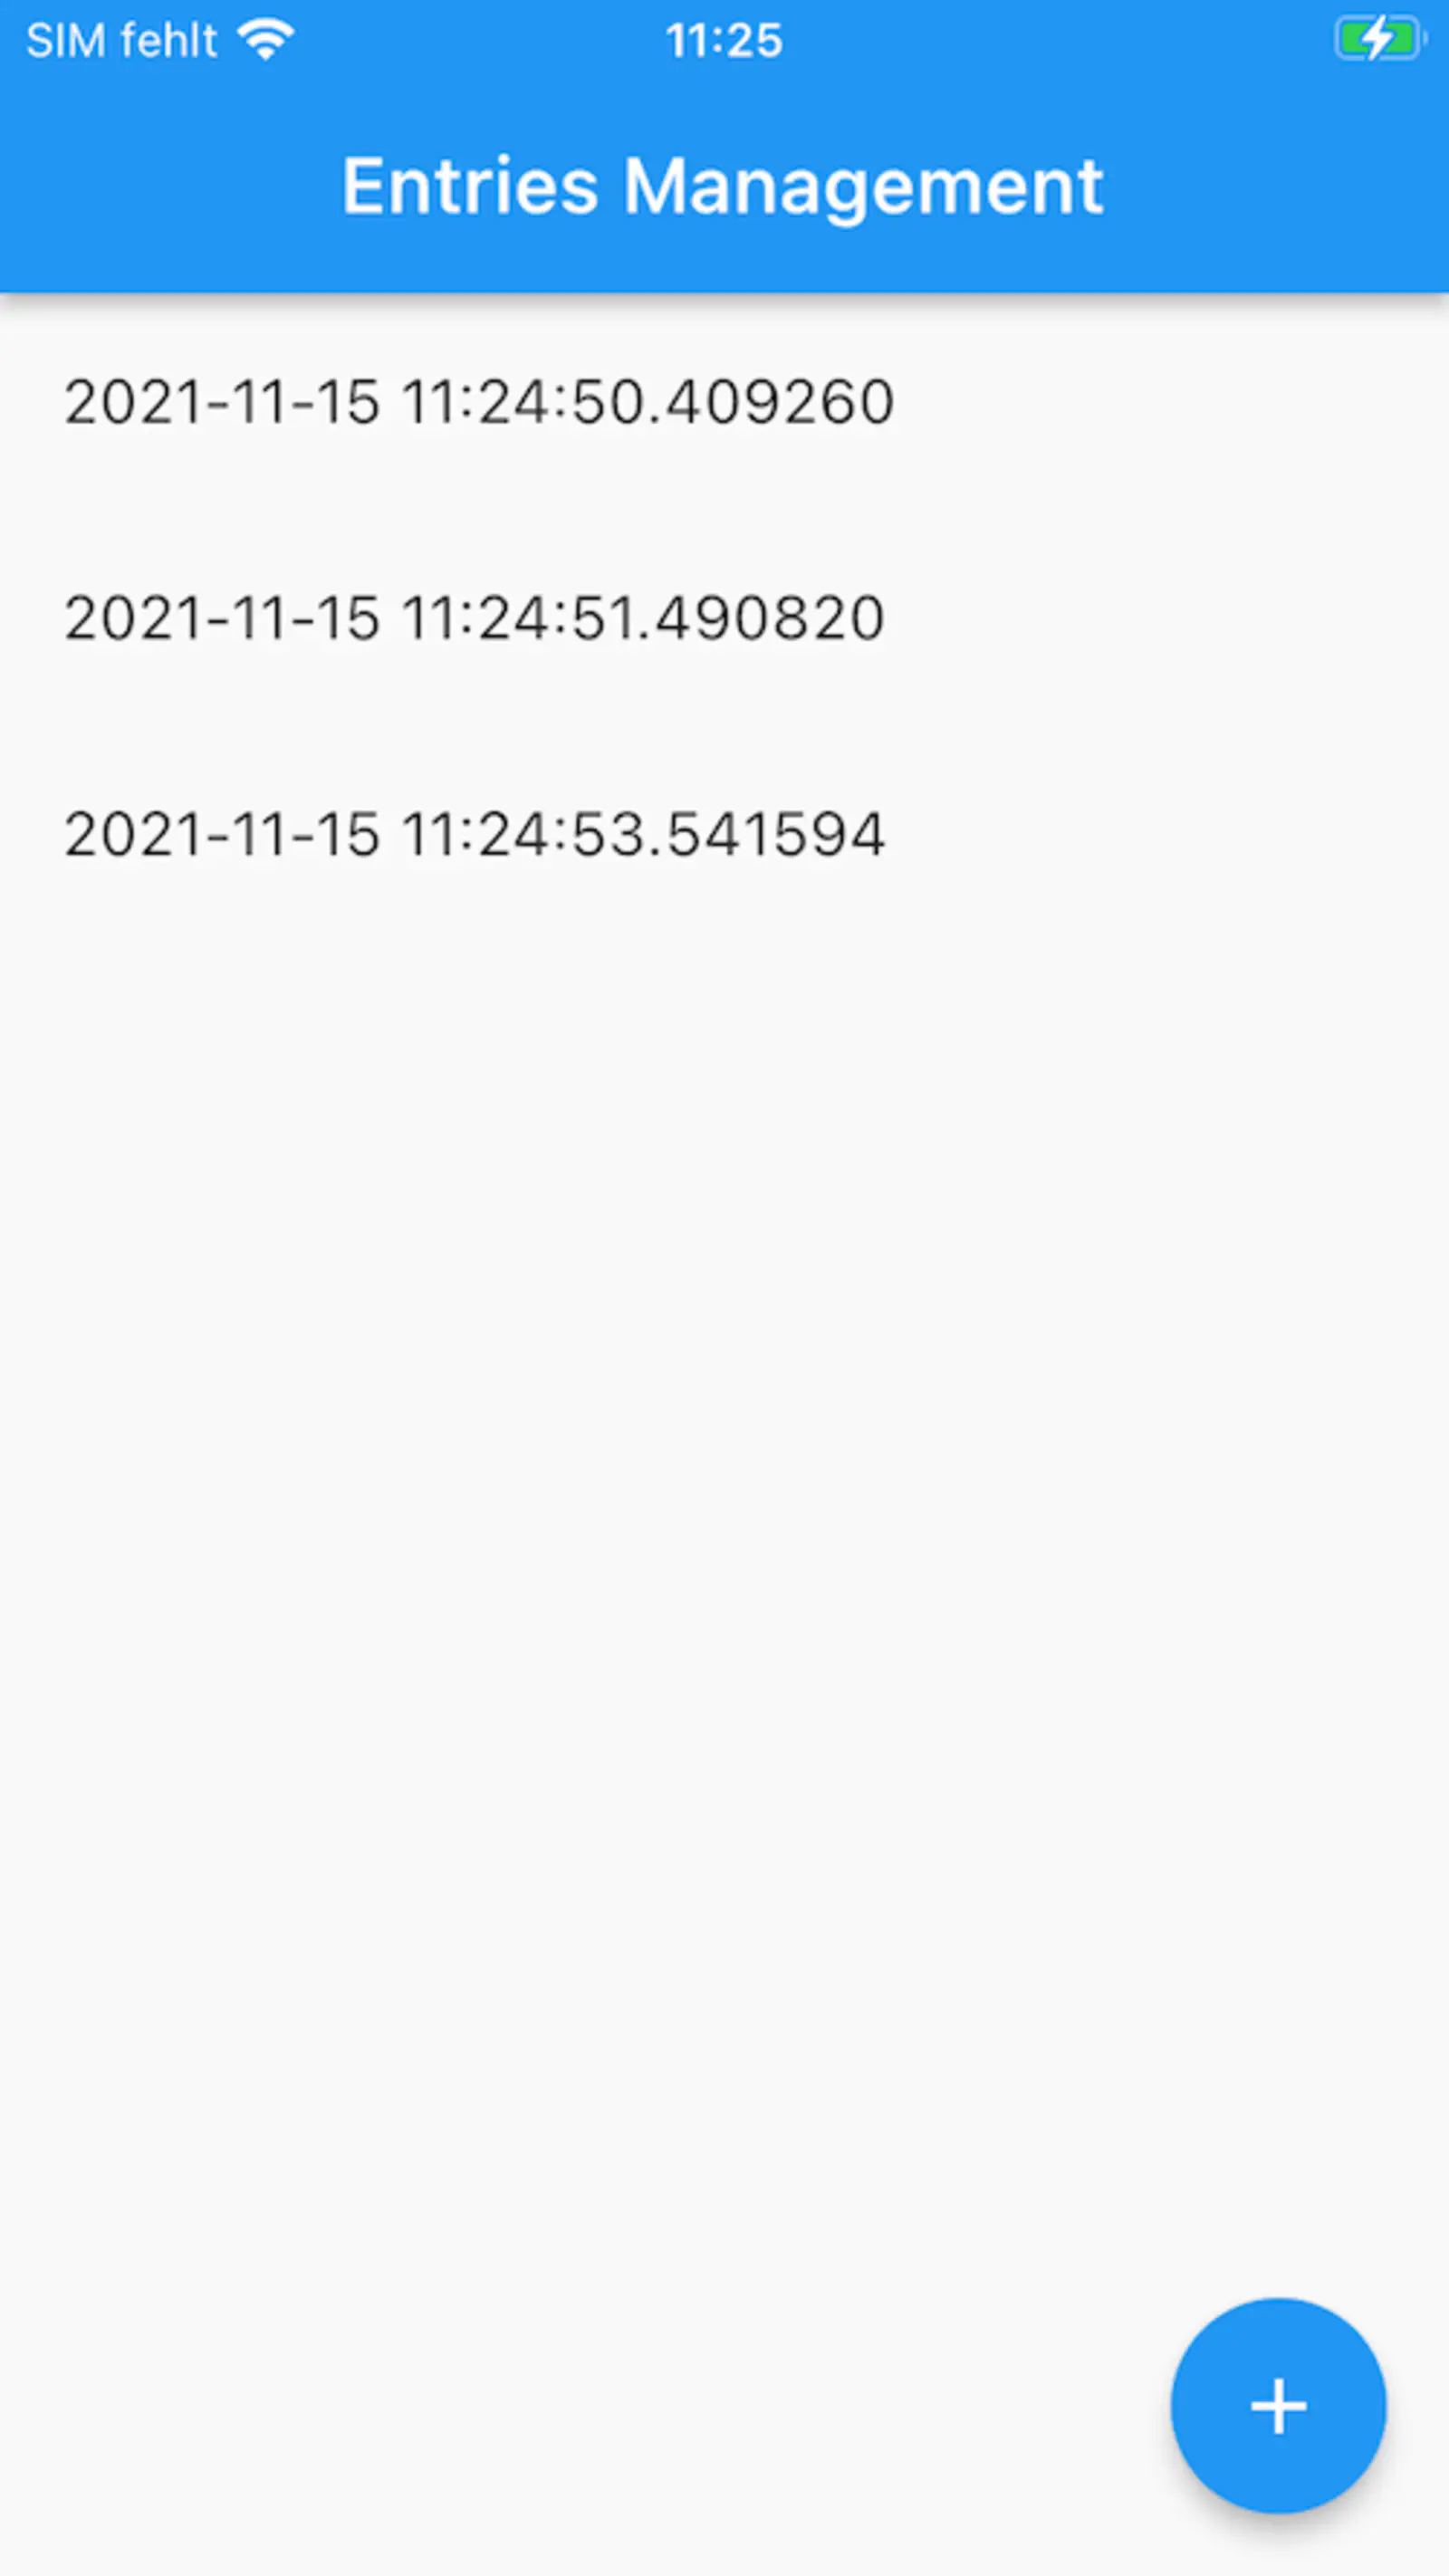
The source code of this tutorial can be found on
GitHub: https://github.com/bettercoding-dev/riverpod-architecture.
Summary
So, shortly, wrap up what we have learned in this tutorial.
First, we had a look at how the data flow in our app is going to look like. We learned which parts we need in our app and created the according components.
Second, we saw that we can use Riverpod not only for state management, but also for dependency injection and why it makes sense so build our app this way.
Finally, we built our user interface that interacts with a controller and reacts to changes in the app state that we created used Riverpod.
I hope this tutorial helps you to understand how to structure your app using Riverpod. Let me know in the comments if you want to see more tutorials about Riverpod on this blog. Also, if you have any questions about this tutorial, comment below.